Thursday, October 27, 2011

"Buon, Halloween Everyone" Plus "Sicilian Style Pumpkin Seeds"


Buon Halloween everyone! It is hard to believe it, but Halloween is just a few days away. The cooler temperatures are finally upon us. The leaves are falling and the colors are spectacular. (or I should say spooktacular) There is so much to see and do at this time of the year; such as apple picking and bobbing, costume parties, visiting haunted houses, horror films, trick-or-treating, carving jack-o‘-lanterns and many more fun activities, too numerous to mention.

1965- I was 11 yrs old
I have so many fond memories of when I was young, going to Halloween parties and wondering what costume I wanted to wear that year for Trick or Treating. I remember when I was about 11 years old, my grandmother “Nanni,” make this basket of flowers as a costume for the Girl Scouts Halloween party I was invited to. It was hard to wear, as you can see in the photo.  I literally was a basket of flowers. Due to her creative flare, I won first prize for the best costume that year. Another fond memory was of my brother, Chris. I would help him get dressed up in his costume and would take him up and down the blocks in our neighborhood Trick or Treating. We would then go back home and empty out all the candy and goodies from our bags, and continue up and down the blocks. At that time, you would be able to go from door to door with no worries. By the time we would finally get home, we were both exhausted, but it was fun and a memory I will never forget. Halloween was always a fun time in my family growing up, even my parents got in on the act. (see photo)
1993- My mom & dad
Did you know that since 1995, trick or treating in the town of Sandusky, Ohio, has been against the law for anyone older than 14? Did you know that it is very rare for a full moon to occur at the same time as Halloween? It has only occurred in-1925, 1944, 1955, and 1974. The next time it is said to occur is October 31, 2020. Or, maybe you knew that according to ancient superstitions, if you stare into a mirror at midnight on “All-Hallows Eve,” or “Halloween“, you’ll see your future spouse. But, I bet everyone knew that pumpkin is one of the best sources of vitamin A, and it tastes so good especially in a pie.

In Italy, the popularity of Halloween has grown immensely over the years. Even though Halloween falls on October 31, All Saint’s Eve is becoming a popular day for costume parties and events. On All Saint’s Day Catholics attend church services in honor of the saints, the martyrs, and those who have died for the Catholic faith. On All Souls Day, Catholics attend mass and they remember those family members that have died. Candles are lit and prayers are said to honor their memory. 

1976- I was a Geisha

In Italy, Halloween is primarily celebrated as the festival of adults, rather than the children. Trick or Treating, which is the customary celebration for children on Halloween, is not followed in Italy. It is the adults that put on masks during the celebration. However, recently more Halloween costume parties are being organized for children.

Many Italian cities now have what they call Urban Trekking, “a sport for all”. All Saints Eve walks are used to visit medieval towers, crypts, dungeons, or castles. Some of these cities hold children’s walks during the afternoon as well. Italy has several chilling displays of mummies and bones in catacombs, churches and crypts. These mummies have been naturally preserved and the displays can be a macabre sight, not recommended for young children.

In Italy, most every household arranges for a special cake called the Ossa dei Morti, or “Beans of the Dead”, which was in the shape of a bean. This ritual stands for their belief that the living and the departed souls of the near and dear ones, come together to participate in the Feast. Today’s recipe is my tribute to Halloween and to all Italian food lovers. It is one of my favorites and a great way to appreciate those pumpkin seeds from your carved pumpkins. In Sicily, Italy, it is still a tradition to eat salted pumpkins seeds.

Toasted Pumpkin Seeds, Sicilian Style
 A traditional recipe from Academia Barilla

Cooking time: 1 hour
Ingredients:
Plenty of Pumpkin seeds
Extra Virgin Olive Oil
Salt and Black Olives
Black pepper, to taste
Directions:
Start, by scooping all of the pumpkin seeds out of the pumpkin. Make sure to rinse the seeds very thoroughly to remove all of the pulp. Drain the seeds and spread them out on a paper towel, allowing them to dry for at least 2 hours. Preheat the oven to 275 F. While the oven is preheating, pour some extra virgin olive oil in a bowl. Toss the pumpkin seeds in the mixture. Drain the seeds and lay across a baking sheet with an edge. Sprinkle with salt, black olives, and black pepper. Bake about 30-45 minutes, tossing every 15 to 20 minutes, until golden brown. Allow the pumpkin seeds to cool before serving.
And don’t forget to accompany the toasted pumpkin seeds with a Vampire Kiss drink. I thought it would hit the spot. Here is my recipe, if you DARE!!! Enjoy!

Vampire Kiss
Serves 1

2 parts passion fruit-flavored rum
1 part tonic water
Splash of cranberry juice
Black cherry, for garnish

Directions:
Shake all ingredients with ice.
Strain into a cocktail glass and garnish with a black cherry.

 
Till Next Time…….


Copyright © 2011 “Family Plus Food Equals Love” All Rights Reserved.


Thursday, October 20, 2011

Benvenuti! Celebrate, World Pasta Day, With "Homemade Manicotti"


Benvenuti! Welcome everyone, to my table, and lets eat pasta, pasta, and more pasta! Why, you ask? Because October 25th is World Pasta Day. The objective of World Pasta Day, now in its 16th year, is to draw the attention of the media and the consumers to pasta. The fact is that pasta is a global food, which is consumed in all five continents. Another purpose of World Pasta Day is to encourage the nutritional and culinary advantages of pasta. The World Pasta Congress held a meeting in Rome, Italy, on October 25,1995. Delegations from various countries discussed together the theme of pasta consumption, exchanging their ideas and experiences. After two years, in 1997, World Pasta Day was created, to recall and enhance the first event that took place with the international pasta community.

The International Pasta Organization (IPO) invites families, chefs and restaurants around the world to gather friends and loved ones and cook up their favorite pasta dish for health, taste, and convenience. Pasta is enriched with vitamin-B which is necessary for cell formation, mental alertness, and energy conservation, plus it is very helpful in boosting the immune system. When pasta is combined with vegetables, legumes, cheeses, olive oils and fish, it is an added health advantage.

To celebrate World Pasta Day, it is suggested that you try a new pasta. There are 600 shapes and flavors produced worldwide, including many whole grain options, as well as gluten free. But, watch your portions. Americans tend to overload their plates. A healthy portion of pasta is one to two cups cooked (1 cup of cooked pasta is about 200 calories). When eaten in the proper portions and in combination with healthy foods, pasta does not cause weight gain. Another way to enjoy pasta is to go meatless, try a hearty vegetable and bean soup or pasta with seasonal vegetables like cauliflower, or even pumpkin for a perfect fall meal. World Pasta Day is a great incentive to prepare a healthy pasta meal by getting creative in your kitchen. So, celebrate pasta and gather with family and friends to take advantage of a delicious meal.

As you prepare pasta for your World Pasta Day, I would love to share a few tips with you:
1. Use lots of water when cooking pasta. Do not add oil. Stir occasionally to keep the pasta from sticking together.
2. Pasta is ready when it’s “al dente.” It should be cooked completely through, yet firm enough to offer some resistance to your bite.
3. Many pasta shapes come in different sizes. The Italian suffix “ini” means smaller
(example: spaghettini is a thin version of spaghetti), while “oni” means larger.

1956, my dad's side of the family
From the left: my dad holding me and
my mom is bending in front of him

Being an Italian-American, pasta is a big part of our family gatherings. I remember on Sundays we would have the whole family over and “macaroni” as we called it, was on the menu for the day. We would wonder what type of pasta would my mom cook for that particular Sunday dinner. My personal favorites are shells and angel hair, or capellini. The shells always held the sauce in the little pocket and was fun to eat. The angel hair, is much thinner than spaghetti, it also cooks very fast. My recipe this week is one that my mother taught me how to make, which are like pillows of soft cheese in your mouth. Homemade Manicotti is so delectable that you won’t mind some extra time in the kitchen creating these scrumptious crepes. Buon Gusto!! (enjoy)


Homemade Manicotti Shells (crepes) and Filling

To make the shells (crepes):

Ingredients: Makes about 24
8 Eggs
2 Cups of All Purpose Flour
1 Teaspoon of salt
1 cup of water
Small amount of Butter / oil for pan
Directions:
Put eggs in a blender, then add water and salt. Then add flour a little at a time as you are blending together. Brush melted butter or a bit of oil in your sauté pan and pour batter into the pan, ( I use a shot glass to measure out the amount of batter ) tilting to coat the bottom of the pan (you want a very thin crepe). Cook only until the underside is lightly browned and is just set, then turn and cook the other side. Invert onto plate; continue until you have about 24 depending on the size of the crepe.
You can freeze these crepes till you are ready to use. Make sure you use a piece of wax paper in between them before you freeze, so it is easier to take apart without breaking the crepes.

The Filling for the crepes:
3 lb container of part skim or whole milk Ricotta
1 lb part skim or whole milk Mozzarella cheese
3/4 cup Pecorino Romano cheese
Fresh Parsley flakes
1 large egg
Salt and pepper to taste
Marinara or Meat Sauce (if you need an easy tomato sauce, check out my mom’s recipe on my blog post of August 18th)

Directions:
1. Mix ricotta, cheese, parsley, and salt. Taste. Adjust seasoning according to taste and then stir in one egg.
2. Slice mozzarella into small bite size pieces. Then add to the mixture of ricotta etc. Mix all together.
3. Lay crepe on flat surface or in your hand. Place about 1 tablespoon of ricotta (more if larger crepe) into the center of crepe and spread out to edges. Fold one edge halfway over and then fold the other side to form a packet. They should be sort of flat.
4. Spread a layer of sauce onto a baking pan. Lay manicotti side by side and arrange them until the pan is filled. Add another layer of sauce on top and sprinkle with grated cheese.
5. Bake at 350 for 25-30 minutes and sauce is bubbling and cheese is melted.

Till Next Time…….
 
Copyright © 2011 “Family Plus Food Equals Love” All Rights Reserved
 

Thursday, October 13, 2011

Eurochocolate in Perugia, Italy & Easy Chocolate Cream-Filled Torte


October is a great month for Italian food festivals, especially mushrooms, chestnuts, chocolate, and truffles. On October weekends, you’ll find fall food festivals and wine harvest celebrations all over Italy. One of my favorite festivals is called Eurochocolate. It is a chocolate lover’s paradise. As my readers know, I am a huge chocolate lover. So when I read about this festival, I just had to share it with all of you. This big chocolate festival takes place in Perugia, Italy, from October 14th through October 23rd. Eurochocolate this year celebrates its 18th birthday. This sweet event attracts about 900,000 visitors, and is famous for its Perugina, Baci chocolates.


The Perugina Company was formed in 1907 in the beautiful hill town of Perugia, in Umbria, and soon became one of the most successful confectionary companies in Italy. In 1922, Luisa Spagnoli, one of the founding members of the company, began to experiment with a new product, mixing together chocolate with hazelnuts. The product was delicious and took a rather strange form which resembled a fist, and the chocolate came to be called Cazzotto, literally a punch. Later given the more romantic title of Baci (“kiss“) by Giovanni Buitoni, and little love notes were placed inside the confectionary wrapping. Baci chocolates are one of the gifts most commonly exchanged between lovers today. Perugina has four shops in New York including its flagship store on Fifth Ave.

Legend has it that Luisa Spagnoli, wife of one of the founders of the Perugina Company, invented the Baci, in honor of her young love, Giovanni Buitoni, the son of another founding member of the company, who was 14 years her junior. (Incidentally the Buitoni families continue to be famous for their pasta.) Luisa, forced to keep her love a secret, wrote short romantic messages which she wrapped inside the chocolate and gave to Giovanni. After Luisa’s death, Giovanni wanted to keep this tradition of love messages in the chocolate, which can still be found in the wrappings today.

Eurochocolate is the most popular festival that takes place in Perugia and is known as the European capital of chocolate. For 10 days the Umbrian town transforms itself for the occasion in a huge open air pastry shop for the delight of all chocoholics. This Perugia festival will be organized with dozens of events concentrated on the “food of the gods” with exhibitions, cooking classes, tasting, chocolate sculptures, banquets, and many other celebrations. At Eurochocolate you can find a Chocolate Show, with over 150 signatures from around the world. Each year, new themes and entertainment are dedicated to the young and old. In this Chocolate Show, which has the widest range of chocolate products, Italian and foreign crafts, and this year also has an area for gluten-free products. For all the tourists and local Italians, this event is without any doubt a good one to discover the most remote corners of this antique medieval center and to enjoy the famous Umbrian hospitality.  

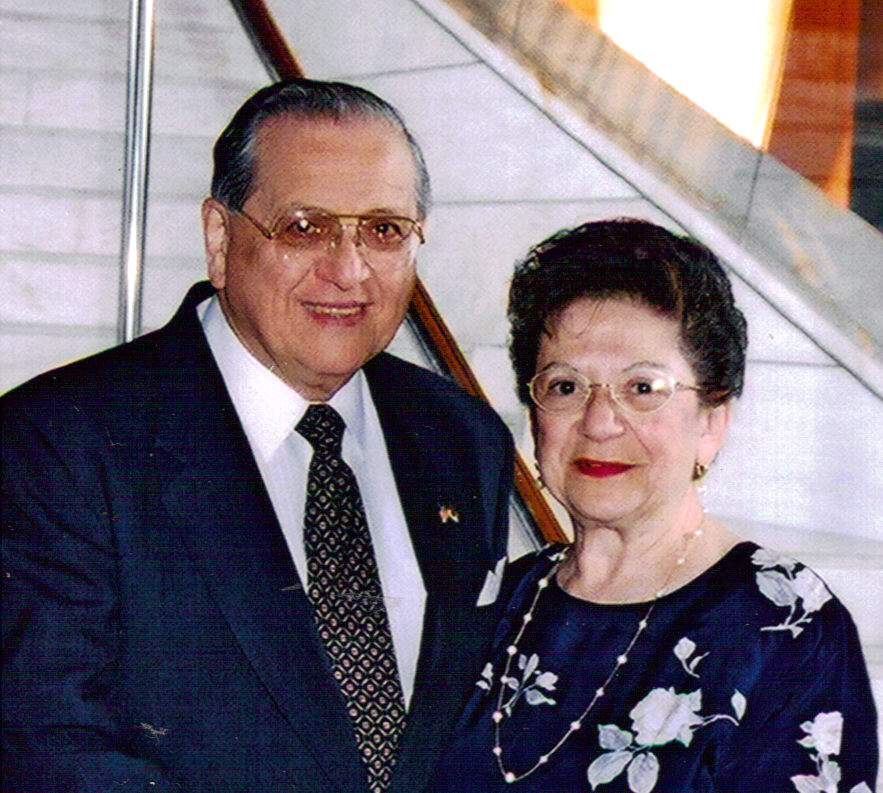
My mom, Madeline & dad, Robert

I remember when I was growing up in my Italian American family; we always had chocolates as a treat. Especially on the holidays, one of my chores when I was young was to polish the silver trays and place the chocolates on them for company. My parents made sure that they always had many goodies to serve their guests. I have many memories of chocolate candies, Ferrara-Italian Torrone (nougat candy), Hershey’s chocolate kisses, and of course we can’t forget the Baci chocolates, from Perugina. The silver wrapper on the Baci looked spectacular on the silver trays which illumined like lights on a Christmas tree. It was extremely hard not to just take one and unwrap the silver paper, but I waited till the guests had their fill. Then, I opened the little ball of silver and took a bite of this delicious hazelnut center which was like a bit of heaven in my mouth. As I would enjoy this petite ball of chocolate, I would read the love note that was enclosed in its wrapper. What a special treat that was when I was young and I still do the same as my parents did many years ago, place them on a silver tray, especially at Christmas so my guests can enjoy them as well.

Well, to honor all things chocolate, I thought this recipe is an easy, creamy, and very elegant “Chocolate Cream-Filled Torte,” for anytime of the year. I have made this a number of times and acquired this recipe from one of my favorite cookbooks, “Hershey’s Classic Recipe Book.” So try a piece of chocolate, whether it is a piece of chocolate cake, candy or even a small Baci, from Perugina. Who doesn’t love chocolate? Enjoy!


Easy Chocolate Cream-Filled Torte

Ingredients:
1 frozen pound cake (10 3/4 ounces) thawed
1/2 cup powdered sugar
1/4 cup Hershey’s Cocoa
1 cup (1/2 pint) cold whipping cream
1 teaspoon vanilla extract
Chocolate Glaze (recipe follows)
Sliced almonds (optional)

Preparation:
1. Cut cake horizontally to make 4 layers. Stir together sugar and cocoa in medium bowl. Add whipping cream and vanilla, beat until stiff.
2. Place bottom cake layer on serving platter. Spread 1/3 of the whipped cream mixture on cake layer. Place next cake layer on top of mixture, continue layering whipped cream mixture and cake until all have been used.
3. Prepare Chocolate Glaze, spoon over top of cake, allowing to drizzle down sides. Garnish with almonds, if desired. Refrigerate until ready to serve. Cover; refrigerate
leftover torte.

Chocolate Glaze:
Melt 2 tablespoons of butter in a small saucepan over low heat. Add 2 tablespoons Hershey’s Cocoa and 2 tablespoons water. Cook, stirring constantly, until smooth and slightly thickened. Do not boil! Remove from heat and gradually add 1 cup of powdered sugar and 1/4 to 1/2 teaspoon almond extract, beating with whisk until smooth. Makes about 1/2 cup glaze.

Makes about 8 to 10 servings


Till Next Time………
 
 
Copyright © 2011 “Family Plus Food Equals Love” All Rights Reserved
 

Thursday, October 6, 2011

Stuffed Artichokes, Columbus Day & National Italian-American Heritage Month


Every year the United States President signs an executive order declaring October as “National Italian-American Heritage Month.” This is a perfect time to enjoy the festivities surrounding Columbus Day and to recognize the many achievements, contributions, culture, history, and food, of  Americans of Italian descent. There were over 5.4 million Italians that immigrated to the United States between 1820 and 1992. Today there are over 26 million Italian Americans living in the United States. This makes them the fifth largest ethnic group. The new World was named “America” for Amerigo Vespucci (1451-1512), the Florentine explorer and geographer who was a friend to Columbus.

The first recorded celebration of Columbus Day in the United States took place in New York City, on October 12, 1792, when a group known as the Columbian Order held a parade to celebrate the 300th anniversary of the landing of Columbus. In 1866, following the start of Italian immigration to the U.S., another parade was held in New York City, this time by the Italians celebrating their link with American history. In 1937, President Franklin D. Roosevelt declared October 12, Columbus Day, as a national holiday. In 1971 the US Congress voted to move the official celebration of Columbus Day to the second Monday in October, which now is a federal holiday.

On August 3, 1492, Christopher Columbus, a sailor from Genoa, Italy, and the 88 members of his crew, plus their families, attended mass in the Church of St. George the Martyr. They prayed for a safe voyage. Leaving the church they boarded their three ships, the Nina, the Pinta, and the Santa Maria, which was Columbus’ flagship, and began their voyage to the East Indies. October 12, is also celebrated in Spain, the country which sent Columbus on his famous voyage and whose Queen, Isabella of Castile, provided the financing (money came from the Queen’s personal funds not the national treasury) for his expedition. In Spain, the holiday is known as Hispanic Day, and it is celebrated with a huge parade in Madrid. In New York City, they celebrate with an annual parade which is also broadcasted internationally to Italy. While it is a nationally recognized holiday, not everyone is quick to participate in the festivities. Many people are insisting that it is not fair to celebrate a “discovery” that already had inhabitants, the Native Americans and therefore some states celebrate the holiday by a different name. 
 
The arrival of Europeans in the Americas was without a doubt one of the most important events in modern history, including food history. Many foods that were native to the Americas were brought to Europe and even more European products were brought back to America. Many Americans, especially Italian-Americans, celebrate Columbus Day with food. Food from Italy and many other countries are highlighted at parades and celebrations. In honor of the meal that Christopher Columbus must have eaten on the sail to the Americas, people cook a typical seamen’s dinner. That meal consisted of fish, potatoes, beef, cheese and a variety of other foods such as rice, dried fruits and legumes.

Italy- Late 1800's
(hard to see, click on photo)
My great-great-grandparents
Vincent & Josphine Puzelli
on my mom's side
Even though it must have been a good meal for them on the sea, it just doesn’t sound Italian enough for me. Were was the lasagna, meatballs, pasta, and we can’t forget Italian cookies and desserts? Well, I am not at sea, but I do have a wonderful recipe of the week for you and it is called “Stuffed Italian Artichokes.” I know, you must be saying, I don’t like them, you are wrong! Until you have tried my mom’s recipe made with spices, cheese, and bread crumbs all tucked together inside the leaves of this wonderful little green vegetable and then baked with a crispy top, you really haven’t tasted anything like this before! Now, that’s Italian! So in honor of my Italian-American Heritage and Columbus Day, have fun, celebrate and eat something Italian.

"Buon Appetito!”

"Stuffed Italian Artichokes"

Ingredients:
6 medium artichokes
1 1/4 cups of bread crumbs (plain)
1/2 cup of grated Pecorino-Romano cheese
1/2 cup of fresh chopped parsley
2 teaspoons of minced garlic (fresh or jar)
3/4 teaspoon of salt & freshly ground pepper to taste
1/3 cup of olive oil or vegetable oil

Directions:
Cut off stem and ¾ off the top of artichoke. Then remove some of the outer leaves at the bottom. Use scissors to clip off top of side leaves. (that removes the sticky point on each leaf) Then wash in deep bowl. Fill large pot with water and boil. Place the artichokes in pot carefully and lower heat to medium for about 7 minutes. Fork test bottom of artichoke for tenderness. If fork goes in and out easily, they are done. Next drain and run cold water on artichokes let them sit and cool off. While they are cooling down, mix the bread crumbs, parsley, minced garlic, grated cheese and a sprinkle of salt with pepper. Mix in a little oil with hands. When it feels like a sandy consistency then you are ready to fill. Gently spread the leaves a little apart and sprinkle some of the bread crumb mixture between each of the leaves. Place the now stuffed artichokes in a glass Pyrex baking dish. (7x11x1.5) Drizzle a small amount of oil on top of each artichoke. Put a small amount of water in bottom of pan about ¼ inch deep. Bake for about 25-30 minutes at 350° The top should be a little browned and crispy, when they are ready to eat.


Till Next Time…….
 
Copyright © 2011 “Family Plus Food Equals Love” All Rights Reserved


Thursday, September 29, 2011

October is National Pretzel Month!


Who doesn’t love pretzels? Can you believe that October is National Pretzel Month? Pretzels come in so many varieties, sticks, loops, long, short, braids, hard, soft, thin and thick. Hard pretzels originated in the United States in 1850 at the Sturgis Bakery in Lititz, Pennsylvania. In Europe, snack pretzels are sprinkled with salt, sesame and poppy seeds, or with cheese. In the U.S., they come in a variety of flavors and with different coatings, such as yogurt, chocolate, strawberry, cheese, mustard, nuts, sugar glazes and many others. Pretzels can be crumbled and used as a topping for ice cream, which eventually led to the development of an ice cream cone tasting like a pretzel.

Italian Taralli

A pretzel is known by different names in other countries. In Germany, pretzels are called Brezel, in Polish it is known as Precel, the Norwegian and the Danish people call it Kringle, and the French, Spanish, and the Italians call it Pretzel, Bretzel, or Brezel. In Italy, the Taralli is an Italian snack food that is similar in texture to a pretzel. Taralli can either be sweet or savory. Sometimes they are glazed with sugar, may be flavored with onion, garlic, seeds, pepper, fennel, or just salt. The sweet and plain Taralli are often dunked in wine. The Taralli shape are classically formed into small rings or ovals. They are boiled then baked, or deep fried.

 Most people agree that the pretzels were invented by monks and have a Christian background. According to history, in 610 AD, an Italian monk invented pretzels as a reward to children who learned their prayers. He called the strips of baked dough, folded to resemble arms crossing the chest, ’pretiola’. (little rewards) However, there is no source cited to back up these details. Another source locates the invention in a monastery in southern France. In Germany there are stories that pretzels were the invention of their bakers. In Greece, a ringed bread, derived from communion bread used in monasteries a thousand years ago, may also be related to the invention of the looped pretzel.

Within the Catholic church, pretzels were regarded as having religious significance for both ingredients and shape. Pretzels made with a simple recipe using only flour and water could be eaten during Lent, when Christians were forbidden to eat eggs, lard, or dairy products such as milk and butter. As time passed, pretzels became associated with both Lent and Easter.

In the 19th century, southern German and Swiss German immigrants introduced the pretzel to North America. These immigrants became known as the Pennsylvania Dutch. Many handmade pretzel bakeries populated the central Pennsylvania countryside, and the pretzel‘s popularity spread. In the 20th century, soft pretzels became extremely popular in other regions of the United States. Cities like Philadelphia, Chicago, and New York, became famous for their soft pretzels. With increased popularity due to mass production, pretzels were distributed at schools, grocery stores, movie theaters, sports stadiums, arenas, and street vendors selling pretzels on street corners in wooden glass enclosed cases.

From left: my aunt Sophie, my Mom, my son Paul,
myself, & my brother Chris, in N.Y.C. 

As a young child, I remember when I would go to N.Y.C. with my family, the hot soft pretzels were always a treat. We would be walking along 5th Ave, near all the famous department stores, like Macy’s and Lord & Taylor, and low and behold we would see one, a vendor selling hot soft pretzels on the corner. You could smell the baked dough and the mustard as you were getting closer to the stand that sold them. It was wrapped in waxed paper and placed in a brown paper bag. To me, the best time to eat them was in the winter when the weather was cold outside. The hot bag filled with pretzels would warm your hands. Then as we continued walking, I would pull apart a piece of the hot pretzel and leave the rest in the bag to keep warm. All the salt would be the first thing that I would lick off. The hot soft dough would just melt in your mouth and it always seemed to warm up your stomach. At that time you could get 3 pretzels for $1.00, and what would be left, was an empty bag with some salt crystals left at the bottom. What a delicious memory to have with my family.

NYC Pretzel Vendor

Today, Pennsylvania is the center of the American pretzel production for the hard crispy and the soft bread types of pretzels. Pennsylvania with its large German background produces 80% of the nation’s pretzels. In 1963 the largest pretzel of it’s time weighing 40 pounds and measuring 5 feet across was baked by Joseph Nacchio of the Federal Pretzel Baking Company. In 1993 the Pretzel Museum opened in Philadelphia, operated by the Nacchio family.

My recipe this week is called “Home Made Soft Pretzels” I have made these before and I usually have my family knocking on my door, for more. The soft dough, is so light and the honey butter mix melted on the top of each pretzel reminds me that I’m back on the corner of 5th Ave, reliving my childhood all over again. Memories never tasted so good. So enjoy, whether you like the sticks, chocolate covered or the big soft ones with mustard on top, celebrate pretzels with a bag today.

Home Made Soft Pretzels

Total Time: 1 hr 55 minutes
Prep: 25 minutes
Yield: 4 to 6 servings


Ingredients:
2 tablespoons yeast
2 cups of warm water
6 cups all-purpose unbleached flour
1 tablespoon of salt
2 tablespoons of sugar
1 /4 cup of honey
3 eggs beaten
Honey Butter Mix ( recipe follows)
Kosher salt, for sprinkling

“Honey Butter Mix”
1 /2 cup of melted butter
1/ 4 cup of honey
In a small bowl combine melted butter and honey

Directions:
Preheat oven to 425 degrees F.
In a large bowl, combine the yeast and warm water, allow to sit for 5 minutes till somewhat foamy. Add the flour, salt, sugar, honey and eggs. Mix thoroughly for about 10 minutes. Let the dough rise about 10 to 15 minutes. Divide the dough into 4-ounce portions and roll out each piece into a long rope shape. Now shape the pretzel dough and pinch the 2 (arms) to maintain them from coming apart. Place on greased cookie sheet or you can use parchment paper and let rise for 1 hour. Brush with Honey Butter Mix and sprinkle with kosher salt. Bake for 20 minutes till light brown. Remove to cool for 5 minutes prior to eating.


Till Next Time…..

Copyright © 2011 “Family Plus Food Equals Love” All Rights Reserved
  

Thursday, September 22, 2011

Time for Apple Pie! There is a chill in the air...


Can it be, I feel a chill in the air! The leaves are starting to fall, and the kiddies are back in school. This means only one thing, the first day of autumn is coming. Yes, I just looked at my calendar and September 23rd is the Autumnal Equinox. It is so hard to believe that the summer went by so fast and here we are in the fall season.

When it gets cooler, I love to open the windows and just be able to breathe the crisp air that comes this time of year. To me this is a magical season. Pumpkins, Apples, Indian corn and Gourds plus the colors of the leaves, with its gold, red, and green hues that are so brilliant. The hustle and bustle of the approaching holidays, Halloween, Thanksgiving, and my favorite of all, Christmas. The chill in the air means sweaters, jackets, and rosy cheeks on children’s faces from playing outside in the leaves. As you look inside the windows of the houses, you can see families cooking, fireplaces lit and you get the feeling of a warm cozy home. Cooking hearty meals, such as stews, soups, baked bread and apple pies are all aromas that enhance your senses and give you the feeling of fall. As you take a brisk walk in the nippy air you can see pumpkins and fall wreaths decorating the houses. To me fall is also a time to be thankful for your family and your friends. So, now that you know what autumn means to me, come along and let us explore what autumn is really all about.

Before the 16th century, “harvest” was the term used to refer to the season. However, as more people gradually moved from working the land, to living in towns, the word “harvest” lost its reference to the time of the year. The word autumn was used to replace harvest, and referred to the season. According to myth, it is believed that the September Equinox is a time of balance when “day and night are equal,” and that by some mystical force one can balance eggs on their end on these days. Some believe that one can only balance an egg within a few hours before or after the exact time of the equinox.

Apples are one of the few fruits you can find fresh any time of the year, especially September through November. However, to me the apple is the one fruit that I associate with fall more than any other. Apples are America’s favorite fruit. The state of Washington grows the most apples followed by New York, and then Michigan. This is a perfect time of the year to head on out to an apple orchard and pick your own apples for a pie, applesauce, or even baked apples. But to me the best way is to pick one off of the tree and try it. There is nothing like the crisp, cool, crunch you hear as you take a bite of this juicy, sweet piece of fruit. Today we have numerous varieties of apples to choose from. Some are best to eat while others are best for cooking and baking. You must have heard the old saying, “An apple a day keeps the doctor away.” This saying comes from an old English adage, “To eat an apple before going to bed, will make the doctor beg for his bread.”

Paul, my son at Maskers Orchard
 
I remember when I was about 11 or so, my parents would take the family and drive to Maskers Apple Orchard, in upstate NY for a fun afternoon of apple picking. We would run and find a spot so we could pick the apples from the trees and put them in a big bushel. My mom would make us lunch and we were allowed to picnic on the grounds in-between the apple trees. It was wonderful, especially on a crisp day. The orchard had a Country Store that my family and I would visit at the end of the day. As we entered the store the aromas that would encircle our heads was like a bit of heaven. The shelves held home made jams, jellies, honey and candy apples. They also sold baked goods, like home made breads, cakes, and pies. As we would drive back home with the car filled with apples and goodies, I always thought that this was one of my favorite memories with my family. When I had my son, many years later, I continued the tradition of going apple picking at Maskers Orchards and now my son will have memories like I did.

So, in honor of the first day of Fall, I am sharing with you my “Apple Pie” recipe. This pie is a favorite among my family and friends. After years of making this scrumptious pie, I have perfected its fruity richness and I’m sure it will be very pleasing to your taste buds.

Dottie’s “Apple Pie”

Ingredients:
8-10 apples (Macintosh and 2 Granny Smith)
1 cup of granulated sugar
¼ teaspoon of salt
2 ½ tablespoons of flour
1 teaspoon of cinnamon
1 tablespoon of unsalted butter
1 recipe of plain pie pastry (for crust)
(you can make your own crust, but this is a time saver)
Secret ingredient is a dash of fresh Nutmeg
Directions:
Pare and slice apples very, very thin. Sift dry ingredients together and mix with apples. Line pie pan (9 inch glass is what I use) with the pastry crust. Fill with apple mixture, dot with butter before putting on top of crust. Then put top crust on the pie. Crimp edges, cut three slits in top of pie or use a pie stencil. Brush pie with milk or cream. Then sprinkle the pie top with some granulated sugar before baking.
Bake in a very HOT oven 450 ° for the first 15 minutes. Then reduce temperature to 350 ° for the next 45 minutes or longer till golden brown. Put pie on lined cookie pan, (foil or parchment paper) so if any drippings come out from the pie, it will be easier for clean up.
 
Till Next Time………..
 
Copyright © 2011 All Rights Reserved
 

Thursday, September 15, 2011

"Mama's Italian Meatballs" & National Play-Doh Day


When I was a little child, my favorite toy to play with was Play-Doh. I loved the cool feel and the soft texture of the Play-Doh in my hands. Play-Doh came in 4 colors, White, (this was the first color) Yellow, Red, and Blue. (these were added later on) It had such a whimsical scent that today if I smell a Play-Doh can it brings back so many memories of my childhood. I remember creating many different shapes. Then, I experimented with the colors by mixing them together which would get my imagination to run wild. I also had so much fun trying to emulate my mom as she was cooking dinner by creating food items. When I was young they did not have computers and all the digital technical items we have today, so we had to use our minds and thoughts with play to keep us occupied. The reason why I am writing about Play-Doh is that believe it or not, National Play-Doh Day is September 18th. To date, over seven hundred million pounds of Play-Doh have been sold. Did you know that? I had no idea, but it has brought back fond memories that I had as a child.

What is Play-Doh and where did it come from you may ask? Play-Doh is a nontoxic modeling compound. It is easy to use and easy to clean up. It was manufactured in 1930 by Noah McVicker in Cincinnati, Ohio and was used for a wallpaper cleaner. When a classroom of children began using the wallpaper cleaner as a modeling compound the product was reworked and in 1956 it was launched in the toy market at an educational convention. Then, history was made! In 1958, Play-Doh’s sales reached nearly $3 million. In 1964, Play-Doh was exported to England, France and Italy. In the 1980’s the cardboard can was discontinued for a more cost effective plastic container. The colors Gold and Silver were added to Play-Doh’s palette in 1996 to celebrate Play-Doh’s 40th anniversary. Since it's conception, Hasbro (current owners) has created many accessories to go along with Play-Doh, which includes the Play-Doh Fun Factory and The Play-Doh Fuzzy Pumper Barber & Beauty Shop just to name a few. More than 2 billion cans of Play-Doh were sold between 1955 and 2005, plus Play-Doh is being sold in 75 countries around the world at 95 million cans a year. In 2003, the Toy Industry Association placed Play-Doh into its “Century of Toys List”, of the 100 most memorable and most creative toys of the Twentieth Century.

If you can’t find Play-Doh in your area, I have a simple recipe for Play-Dough to be made at home with your children. I used this recipe with my nieces and nephews one Sunday afternoon and they loved the fact of making the Play-Dough but also being able to use it to create Christmas ornaments.  
 
Play-Dough
¼ cup of salt
1 cup of flour
¼ cup of water

Have your child mix the flour and salt together in a bowl, then add your water. Knead and squeeze the dough to make a clay consistency. You may need to add a little more water a few drops at a time. You can also add food coloring to part of the dough. This can be kept in an airtight container for a few days.

My mom Madeline and myself
Children love to imitate their parents. I know, I did years ago with my Play-Doh. My mom was making spaghetti with meatballs, one night for dinner and I tried to copy her with my Play-Doh. I rolled it out just like she did with the meatball mixture and then I tried to create the spaghetti in long thin strips. (you can use the accessory that extrudes the Play-Doh, which really looks like spaghetti) So as I end this blog post for this week, I thought it would be a fun project for you and your children to make memories. Let them create their version of Spaghetti and Meatballs with Play-Doh and you can make the real thing! The recipe this week is “Mama’s Italian Meatballs” one of my mom’s favorite recipes which I would love to share with you. Her meatballs are very flavorsome to your taste buds. They are mouthwatering and the aroma of them frying is just like being home again. My dad loves to sneak a few after they are fried. Just before they go into the sauce, he says, “I want to make sure they are cooked right. “ We know, dad, you just can’t wait to gobble them up, with the flavors of spices and cheese all rolled into one delicious meatball. So, treasure Play-Doh with your children and enjoy “Mama’s Italian Meatballs.”

Mama’s Italian Meatballs”

Yields: 30 meatballs-(10 meatballs per pound)
Ingredients:
2 cups of bread crumbs (if too stiff add a sprinkle of water)
3 lbs of beef chuck chopped meat (80% lean, but not too lean, you need a little fat for moisture)
1 ½ teaspoons of minced garlic
¾ cup of fresh Pecorino Romano cheese, grated
6 eggs
½ teaspoon of salt
½ teaspoon of freshly ground pepper
3 fistfuls of fresh parsley-chopped
Vegetable oil or Canola oil 
 
Directions:
Place oil about ¼ to ½ inches in frying pan. Heat oil before placing the meatballs in pan.
Put the beef chuck in a med-sized bowl and add all ingredients except the oil. Gently combine the meat using your hands until evenly mixed. The mixture should be slightly wet and workable, not too sticky. Using your hands, gently shape meat into balls. Don’t worry if they are not perfectly round, but try to make them all uniform for even cooking. Don’t roll them over and over, be gentle.

Add the meatballs to the pan and fry them until they are brown on one side then turn. Keep turning with tongs until they are completely and evenly browned. Transfer the cooked meatballs to a paper towel to drain. Now it is time to place your meatballs into your sauce to cook for a while and then serve with pasta of your choice. If you need a very tasty and easy marinara sauce, check out my post on Aug 18th for my mom’s recipe.
Tip:
In place of bread crumbs, take chunks of stale Italian bread and soak in a bowl with water. As it softens remove crust and squeeze water out of bread chunks. Separate into small pieces and add to chopped meat mixture.    Abbondanza!

Till Next Time……
 
 
Copyright © 2011 All Rights Reserved

Thursday, September 8, 2011

"Italian Stuffed Mushrooms" September is National Mushroom Month


Join with me and let’s celebrate “National Mushroom Month.” which is observed every September. Since I can remember, growing up in my Italian American family, my mom would always use mushrooms in her recipes. There are many varieties of mushrooms, such as the white button, crimini, portabella, shiitake and oyster to name a few. The button mushroom is the most widely used. My mom would use a number of varieties for different dishes, but she preferred to use the white button mushrooms more than the others.

To have a better understanding about where mushrooms originated from and some interesting facts, we have to travel back to ancient folklore. Egyptians believed that mushrooms were the plant of immortality. The flavors captivated the Pharaohs so much that mushrooms were decreed food for the royalty. Common people were not allowed to even touch them. According to some people Louis XIV was the first mushroom grower in France. Mushrooms were grown in caves near Paris. France showed England how simple a crop of mushrooms were to cultivate, so England began to produce them as well. The first American to cultivate mushrooms here in the United States was Louis F. Lambert from Minnesota. Many people found that mushrooms were easy to grow and cheap to buy. 

Pennsylvania is the lead in mushroom production. In 2006/2007, 827 million lbs. of mushrooms have been produced and sold. Speaking of Pennsylvania, if you are a fan of all things mushroom or just want to enjoy a fun (gi) time, go to Kennett Square in PA and join in the Mushroom Capital of the World for the 26th annual Mushroom Festival which takes place this weekend. Edible mushrooms are known as the meat of the vegetable world. Most mushrooms are sold in supermarkets which have been grown in mushroom farms and are used in cooking many different cuisines of the world. Here are some tips as to selecting and cleaning mushrooms.

Selecting:
1. Purchase mushrooms that are firm with a fresh, smooth appearance
2. Surfaces should be dry, but not dried out and appear plump
3. Equivalents: 1 pound fresh mushrooms = 6 cups sliced fresh mushrooms = 3 ounces
Dried mushrooms
4. Some mushrooms may keep for up to one week in the refrigerator
5. Fresh mushrooms should never be frozen, but frozen sautéed mushrooms will keep for up to one month  
 
Cleaning:
1. Brush off any dirt with your fingers or a damp paper towel, or rinse the mushrooms briefly under running water and pat dry with a paper towel
2. Do not soak mushrooms in water as they easily absorb moisture
3. If the stem is tough, trim it before using. For Shiitakes, stems should be removed before use

My mom at 2 yrs old
(1931)
4. Dried mushrooms are often excellent substitutes for fresh. You can reconstitute dried mushrooms by soaking or simmering them. Don’t throw away the soaking liquid, as it can add flavor to your sauce. You can also pulverize dried mushrooms with a food processor or blender, and then use the mushroom powder to flavor sauces and stews.

Now that you know all about mushrooms, you can try my mom’s recipe called “Italian Stuffed Mushrooms.” This dish has been in my family for years and everyone loves it. My mom used to make this flavorful recipe mainly for holidays, until it was requested by family members for her to prepare this dish for non-holidays as well. You can use this as a side dish or even as an appetizer. As you enter a mushroom into your mouth, you can taste the savory flavor of the spices and cheese in the breadcrumb stuffing mix, which will enhance the richness of the mushroom. Absolutely “yummy” and I’m sure it will be a favorite in your family as it is in mine.

Photo: Courtesy from Food Network
Italian Stuffed Mushrooms

Ingredients:
48 oz large white button mushrooms
2 cups of plain dried bread crumbs
1/3 cup of Pecorino Romano grated cheese
3 teaspoons of minced garlic fresh or jar
2 tablespoons of fresh chopped Italian parsley
Salt and freshly ground pepper to taste
1/3 cup of olive or vegetable oil

Directions:
Preheat oven to 350 F. Clean mushrooms and take the stem off. Mix the bread crumbs with the parsley, garlic, Pecorino Romano, salt and peeper in a small bowl. Now add some oil (about 2 tablespoons) and mix with hands. If you need more oil put in small amount each time until you are mixing the right consistency. When it feels like a sandy consistency then you are ready to stuff the mushroom caps and place on a large cookie/pan sheet. Now, drizzle a small amount of the remaining oil over the top of each mushroom. (This is so they do not dry out, but do not soak) Bake until mushrooms are browned and tender about 25-30 minutes.


This weekend is the 10th Anniversary of  9/11, a day most Americans and the world will never forget. An attack on America took place that day, and thousands of people lost their lives. The entire country was impacted by this tragic day’s events. I would like to say that my heart and prayers go out to the families that have lost loved ones in the World Trade Center in New York City, the Pentagon in Washington D.C., and in Shanksville, Pennsylvania. Plus, my prayers also go to the First Responders, because of their bravery; many have also lost their lives. May our country and the world be safe and God Bless America.


Till Next Time……
 
Copyright © 2011 All Rights Reserved


Thursday, September 1, 2011

Irene and Coffee Nut Raisin Cookies


The day was Friday, August 26th and it was a picture perfect day on Long Island. The sky was blue with a slight breeze. People would say, “The calm before the storm.” One would never know the damage that hurricane Irene would bring the next day and throughout the following week. As you may know, Hurricane Irene plowed through the East Coast this past weekend. So, I heeded the warnings from the news to get prepared. I searched for my candles, flashlights, extra water, charged my cell phone, found non-perishable can foods, batteries, and my radio. Now, I felt I was ready for Irene. Saturday afternoon the rain began and the wind picked up. As I was watching the weather channel, there was a huge bang. It was now early Sunday morning about 2:15 AM. Then, “ALL WENT BLACK. “ I guess Irene’s wrath had finally hit Long Island. As I clicked on my flashlight and went to light some candles, I could hear the wind howling through the windows of the house. I tried looking out of my window, to see what the huge bang was but all I could see was blowing trees and rain in-between the blackness. Later, I found out that the bang was a transformer that had blown.

As my sleepless night continued I kept hearing all kinds of sounds, the rain hitting the windows with a major force was awfully scary. Then finally, daylight came through the windows and I could see it was still raining with the winds blowing, but you could see that Irene was on her way out. Still no electric power and no cell phone connection either. I felt like I was disconnected from the world. No way to even make some coffee or something hot. Then I heard a knock on the door, it was my sister-in-law with my nephew and niece. They had been driving around to see the damage. The stories they told me about trees falling, poles, and branches as well as traffic lights that were not working, it sounded like a disaster movie description. They also were without power. They mentioned that the diner was opened. They must have had a generator. So I ventured out and had a hot meal, and then back home to the darkness.

By Monday afternoon I had gained cell phone power as well as my electric. Wahoo! Lights, phones and the internet. I was very lucky; other people are still without power and have floods in their basements. Many major roads are still flooded, trees are down, branches and debris is everywhere. As Irene traveled up the east coast, there was devastation through out all the states, but we were lucky. Dealing with a little inconvenience compared to the real devastation that Katrina did in 2005 was not a problem. So, as I post this to my blog, my hope is that everyone is OK, has power, phone connections and I say, “Goodnight Irene!”

My great-grandparents Sofia & Giovanni (sitting) 1918
My grandmother Julia second from the right
Now, as the cleanup continues, my thoughts go to what it must have been like years back in my great-grandmothers day. During the storm, my mind was wondering how spoiled we are with all of our modern equipment. Back in the day, they used gas lamps for light and there wasn't any refrigeration, they had to have the ice man deliver ice to keep their food cold. No modern conveniences like we have today. But yet they raised a family, worked, went to church and it all seemed to work out well. We take these things for granted and we panic when the power goes out. I am just like everyone else out there that can’t understand how to deal without power of any kind. During Irene, when I would go into a room with my candle, automatically I would turn on my light switch. Then I would remember that there aren’t any lights. Can you imagine how ridiculous that is? See what I mean, we’ve become so used to our way of modern life that these things become a habit. Yes, our modern medicine has come a long way, but we should not be so dependant with our modern day world and all of our automated systems. This was also a way to bring the family together to talk, read, play games and learn from our families with a closeness that I think has lost its power. So, as I end this post, I for one will never take for granted electric, phones and try to live a simpler life.

Labor Day is this weekend. It is an American National holiday and it is sometimes called the “unofficial end to summer.” Labor Day’s true meaning is to honor the everyday working people. These people have built and maintained the heart of this country. My recipe this week is one that was passed down from my great-grandmother, Sofia. If you are celebrating for Labor Day weekend, this cookie is very easy to take with you on a picnic or a BB-Q. As you eat these sweet, remarkable cookies, you can taste the texture between the nuts and raisins. I hope that you enjoy them and your holiday weekend.

 
Coffee, Nut and Raisin Cookies

Ingredients:

1 cup of light brown sugar
1 cup of white granulated sugar
2 full tablespoons of Crisco
2 eggs
4 cups of unbleached all purpose flour
2 teaspoons of baking powder
1 cup of raisins and chopped nuts (mixed together)
1 cup of regular brewed coffee
1 pinch of salt

Directions:

Mix sugar and Crisco. Then mix in 1 egg at a time, beating separately. Then mix flour alternately with coffee, baking powder, salt, and mixture of raisins/nuts. Once combined together, drop by tablespoons on to a cookie sheet. Bake at 350 degrees for about 15-20 minutes till browned.
 
 
Till Next Time…………

Copyright © 2011 All Rights Reserved

Thursday, August 25, 2011

Home Made Breads and Home Made Pizza ! Pure Comfort Food....


As far as history has been recorded, bread has been a basic part of the world’s eating habits and a traditional companion with meals. There are various assortments of breads which include different textures and flavors but the most popular types are white, wheat, and whole-grains. In some recipes fruits and vegetables are used in bread making, but the most common ingredients include flour, sugar, yeast, eggs, nuts, spices and milk.
My Grandmother "Nanni"

In Italy, bread is taken quite seriously. Italians have rigid standards when it comes to what a loaf of bread should be. The basic standard Italian bread consists of yeast-leavened, unsweetened and baked in a loaf shape with tapered ends. A typical Italian loaf is thick and has a thin crust. The inside of an Italian bread loaf is moist and porous, which is perfect for absorbing toppings of tomatoes, olive oil, and cheeses. In the United States Italian bread arrived in the 18th century. Italian bread became quite popular very quickly. Today it is frequently used for sandwiches, as a side for soup, for dunking with olive oil and as a side for many Italian pasta dishes accompanied with a glass of wine.

In the baking world, there are many different types of bread flours on the market that make the difference to a successful loaf of bread. The most common of the baking flours used in households today is called all purpose flour. There is cake flour which is very good for baking cookies and cakes. Sourdough and pumpernickel breads use rye flour. Bleached flour has been treated with agents that make it whiter than other flours. (I personally use un-bleached flour) Self Rising flour is used regularly when baking, which is a combination of all purpose flour, salt, baking powder and baking soda. There is flour that is labeled as bread flour and is used for baking breads and rolls. Soy flour is especially made for those who have gluten allergies as it does not contain gluten.

Back row: Nanni, her sister Frances
Front row: Grace, Nanni's mother,
Anna, Nanni's other sister  
As we continue in the baking world there are many types of breads that can be made with other ingredients such as: Bananas, Zucchini, Pumpkin, Corn, Carrot, French bread, Quick bread, Italian bread and Sour Dough bread. Additional items can also be added to your bread recipe such as nuts, raisins, spices and cranberries.

Whatever role bread plays in a meal, the delightful aromas fills a home and it stirs all the senses. I remember when my grandmother (who we called Nanni) would come over for a visit; she would make us a pizza with onions, tomato sauce and fresh mozzarella. She also used the best fresh herbs she could find. Instead of a round pizza pan, she would make the pizza in a baking pan. Her crust was always soft and thick something like a Sicilian pizza would be. It was always fun making pizza with her as she would always tell a few stories about her Italian roots as we were eating it. This recipe is very similar to my grandmothers. It is from MaryAnn Esposito “Cio Italia.” I hope that you enjoy your pizza and make some bread, it really makes the house fragrant. It is what I would call, “real comfort food.”

Pizza

Ingredients:
1 ½ teaspoons active dry yeast
1 ½ cups of warm water (110° -115° F)
3 ½ to 3 ¾ cups unbleached All Purpose Flour
½ teaspoon of salt
½ teaspoon of sugar
1 teaspoon extra virgin olive oil

Directions:
In a large bowl, dissolve the yeast in warm water. Allow the yeast to proof until it is foamy, about 10 minutes. Add 3 cups of flour, salt and sugar. Mix the dough with your hands or use a mixer with a dough hook. Add the remaining flour as needed to make dough that holds together. Place the dough on a floured surface and knead it for about 10 minutes. Grease a bowl with the olive oil and place the dough in the bowl. Turn the dough a few times in the bowl so the oil coats the dough. Cover the bowl tightly with plastic wrap and let it rise for 2 hours in a warm place. Then punch down the dough and knead it for a few minutes on a lightly floured surface. Use the dough to make one large pizza or divide it in half to make 2 small ones.

Now that your dough is made you can make your pizza with any ingredients you wish. Just make sure the ingredients are fresh and you will have a mouth watering pizza that you can’t wait to eat. If you need a marinara sauce for your pizza, please check out my last post for my “Mama’s Marinara Tomato Sauce” recipe. Mangia!

Till Next Time….

Copyright © 2011 All Rights Reserved